How to charge Apple Pencil: 5 quick tips for efficiency
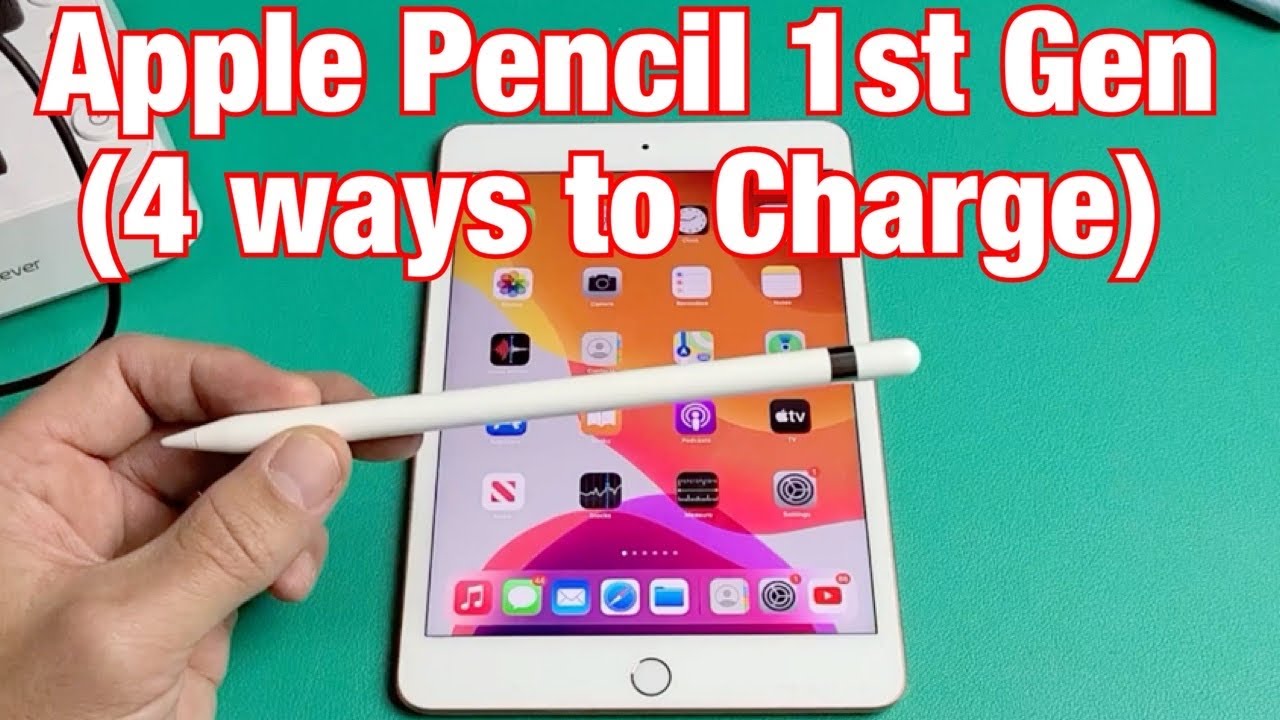
How to Charge Apple Pencil
Have you ever found yourself in the middle of an important task, only to be interrupted by a low battery warning on your Apple Pencil? 😩 If you’re wondering how to charge Apple Pencil effectively, you’re not alone. Whether you’re an artist, note-taker, or simply someone who enjoys the convenience and precision of the Apple Pencil, understanding how to keep it charged and ready for action is crucial. In this article, we’ll explore the best methods to charge your Apple Pencil, along with tips on maximizing its use alongside complementary tools.
Understanding Your Apple Pencil Model
Before diving into the charging process, it’s essential to know which model of Apple Pencil you have, as there are two versions available:
- Apple Pencil (1st generation) – This model is compatible with older iPad models such as iPad 6th and 7th Gen, iPad Air (3rd Gen), and iPad mini (5th Gen).
- Apple Pencil (2nd generation) – This version is designed for the iPad Pro models (11-inch and 12.9-inch), as well as the latest iPad Air.
Understanding which model you’re using will guide you in the charging process.
Charging the 1st Generation Apple Pencil
Charging your Apple Pencil (1st generation) is straightforward:


- Remove the cap at the end of your Apple Pencil.
- Plug the Lightning connector into your iPad’s Lightning port.
- Wait for a few moments; a pop-up window will appear, showing the charge level.
- Once charged (which typically takes about 15-30 minutes), unplug and reattach the cap.
This method is simple but can be less than ideal if you want to use your iPad simultaneously. To overcome this, consider investing in a Lightning adapter, which lets you charge your Apple Pencil separately without using your iPad’s port.
Charging the 2nd Generation Apple Pencil
For the Apple Pencil (2nd generation), the charging method is even more convenient:
- Magnetically attach the Apple Pencil to the side of your compatible iPad.
- The Apple Pencil will begin charging automatically.
- You can check the charging status by swiping down on the iPad to access the Control Center.
This magnetic charging design enhances usability by allowing you to charge while working on the iPad. But that’s not all; let’s explore how to maximize the use of your Apple Pencil through complementary tools.
Complementary Tools to Enhance Your Apple Pencil Experience
Using your Apple Pencil is incredibly versatile, especially when paired with the right tools. Here are some recommendations on how to charge Apple Pencil optimally while enhancing its value:
1. Apple Notes
By using Apple Notes along with your Apple Pencil, you’ll significantly improve your note-taking efficiency:
- Seamless integration allows for sketching, writing, and annotating.
- Easy access to organizational features helps in maintaining notes.
- Collaboration options make sharing more efficient.
- Handwritten notes can be effortlessly converted to text.
2. Procreate
For artists, Procreate is a phenomenal app that enhances the Apple Pencil experience:
- Offers a wide array of brushes and tools ideal for digital drawing.
- Supports multi-touch gestures for complex workflows.
- Allows for real-time blending, layering, and effects.
- Integration with various tutorials that can bolster your artistic skills.
By using how to charge Apple Pencil together with Procreate, you will achieve more efficient results in creating intricate artworks or sketches.
3. Notability
Notability is another valuable tool for users of Apple Pencil:
- Combines handwriting and typing in one app for flexible note-taking.
- Supports audio recordings, allowing for timed connections with notes.
- Advanced search features make finding notes intuitive.
- Easy export options create multiple formats for sharing.
4. GoodNotes
For those who appreciate organization, GoodNotes is a powerful app to consider:
- Realistic digital handwriting experience improves handwritten notes.
- Customizable templates enable multiple note formats.
- OCR technology allows for searching handwritten texts.
- Synchronization across devices ensures easy access from anywhere.
5. Zoom (or Similar Meeting Platforms)
Utilizing Zoom allows for real-time collaboration and presentations:
- Share your iPad screen while using Apple Pencil for clear demonstrations.
- Interactive whiteboarding during meetings enhances team collaboration.
- Record meetings for future reference while using your Apple Pencil for note-taking.
- Provide visual explanations and annotations during presentations.
6. Apple iCloud
Don’t forget about iCloud. Sync your notes created with Apple Pencil across all devices:
- Automatic backup ensures you don’t lose any data.
- Access notes from your iPhone, Mac, or any other device.
- Share documents easily with collaborators without hassle.
- Stay organized with all your documents in one central location.
7. Art Set 4
If you’re into digital painting, Art Set 4 is another app that pairs well with Apple Pencil:
- Mimics traditional drawing tools effectively.
- Intuitive interface allows for quick setup and use.
- Supports high-resolution canvases for professional-grade artwork.
- Variety of customizable brushes enhances creativity.
8. Affinity Designer
This powerful graphic design app, Affinity Designer, optimizes your Apple Pencil usage:
- Offers a combination of vector and raster graphics for flexible design.
- Precision controls allow for finely-tuned artwork and edits.
- Real-time performance caters to heavy-dimensional designs.
- Vector tools enable clean lines and easy adjustments in designs.
9. PDF Expert
PDF Expert enhances the Apple Pencil experience by allowing for easy annotation:
- Highlight, underline, and make comments directly on PDFs.
- Merge documents easily for efficient workflow.
- Intuitive interface provides simple navigation through PDFs.
- Sync with various cloud services for seamless access.
10. Astropad
Astropad allows you to use your iPad as a drawing tablet for your Mac:
- Streamlines the design workflow by using familiar software.
- High-quality connection maintains graphic fidelity.
- Customizable shortcuts and controls enhance user efficiency.
- Low latency ensures a smooth drawing experience.
Best Practices for Charging Your Apple Pencil
To maximize the lifespan of your Apple Pencil battery, follow these tips:
- Charge Regularly: Regular, small charges are better than letting it drain completely.
- Avoid Extreme Temperatures: Keep your Apple Pencil in moderate conditions to avoid battery damage.
- Use Official Chargers: Always use Apple-approved charging accessories.
- Check Battery Health: Monitor its charging details in the battery section of your iPad settings.
Employing these practices alongside how to charge Apple Pencil will improve its performance and durability considerably.
Solving Common Charging Issues
If you encounter difficulties while attempting to charge Apple Pencil, here are a few troubleshooting steps to consider:
- Check the Lightning Connector: Ensure it’s free of debris or damage.
- Restart Your iPad: A simple restart can sometimes resolve charging recognition issues.
- Test with Another Device: If possible, see if it charges with another compatible iPad or Lightning adapter.
- Software Update: Ensure your iPad’s software is up to date to avoid compatibility issues.
By implementing these tips and utilizing how to charge Apple Pencil effectively, you can ensure a productive and creative experience with your device.
Understanding the Charging Process of Apple Pencil
Have you ever wondered how to charge Apple Pencil effectively? 🖊️ Whether you’re sketching, taking notes, or collaborating on projects, ensuring your Apple Pencil is charged is crucial for a seamless experience. In this guide, we’ll explore the detailed process of charging Apple Pencil, offering you tips, tricks, and complementary tools to enhance your productivity.
Types of Apple Pencil
Before diving into the charging methods, it’s essential to highlight that there are two versions of the Apple Pencil: the first-generation and the second-generation. Each has a different charging mechanism:
- Apple Pencil (1st Generation): Charges using a Lightning connector located underneath the cap. This can be plugged directly into your iPad or via the included Lightning adapter.
- Apple Pencil (2nd Generation): Features a magnetic charging mechanism that attaches directly to the side of compatible iPads, eliminating the need for wires.
How to Charge Apple Pencil 1st Generation
Charging the first-generation Apple Pencil is straightforward. Here’s how to do it:
Steps to Charge
- Remove the Cap: Simply pull off the cap at the end of the Apple Pencil to expose the Lightning connector.
- Connect to iPad: Plug the connector directly into your iPad’s Lightning port. If you’re not using the iPad, you can connect it to the Lightning adapter included in the box.
- Check the Charging Indicator: A battery icon will appear on your iPad, showing the battery status of your Apple Pencil. A full charge usually takes about 15-30 minutes.
One of the key advantages of the first-generation Apple Pencil is its quick charging capability. In just 15 seconds of charging, you can get up to 30 minutes of use, making it perfect for those on the go.
How to Charge Apple Pencil 2nd Generation
The second-generation Apple Pencil incorporates modern technology to simplify the charging process:
Steps to Charge
- Attach to iPad: Simply place your Apple Pencil on the flat side of an iPad that supports this feature (iPad Pro models from 2018 and later, iPad Air (4th generation), and iPad mini (6th generation)).
- Check the Charging Status: A notification will pop up on your iPad, showing the battery status.
- Wait for Full Charge: Charging the Apple Pencil takes about 30 minutes to reach full power.
Unlike the first generation, this design allows the Apple Pencil to charge while you’re not using it, meaning you’ll always have it ready without needing to plug it in.
Best Practices for Charging Apple Pencil
To maximize the lifespan and efficiency of your Apple Pencil, consider these best practices:
- Avoid Overcharging: Both models stop charging once they reach full capacity, but it’s wise to unplug or detach them once charged.
- Keep It Clean: Wipe the connectors regularly to ensure efficient charging; dirt or lint can interfere with the connection.
- Don’t Let It Fully Discharge: Try to charge your Apple Pencil before it runs out completely to maintain battery health.
Complementary Tools to Enhance Your Apple Pencil Experience
Combining how to charge Apple Pencil with other tools can elevate your overall user experience. Here are some complementary tools and applications that can enhance your productivity when using Apple Pencil:
1. GoodNotes
Using GoodNotes with your Apple Pencil allows you to take free-hand notes, annotate PDFs, and create stunning sketches. This tool unlocks your creativity, especially when your Pencil is fully charged!
2. Notability
Another excellent app is Notability. Here’s why it’s beneficial:
- Multimedia Notes: Record audio while taking notes simultaneously.
- PDF Annotation: Easily annotate documents, enhancing study sessions.
- Organized Folders: Keep your notes orderly with this user-friendly interface.
- Synchronization: Access your notes across multiple devices seamlessly.
3. Apple’s iPad Pro
The iPad Pro works perfectly with both generations of Apple Pencil. It offers unparalleled graphics capabilities and a fluid experience, making the combination a powerhouse for designers and professionals.
4. Procreate
For artists, Procreate provides a wide array of drawing tools tailored for the Apple Pencil. You can take advantage of its advanced features once you know how to charge your Apple Pencil properly.
5. Apple Notes
Apple’s built-in Notes app is ideal for jotting down quick ideas or doodles. It’s straightforward and effective, making it simple to utilize your charged Apple Pencil anytime.
6. Notability
The Notability app works excellent for students. It allows you to combine handwriting with text, draw sketches, and add photos or audio clips.
7. Microsoft OneNote
If you’re already using Microsoft products, OneNote integrates well with Apple Pencil, allowing you to organize notes efficiently.
8. Adobe Fresco
For creative minds, Adobe Fresco allows for real-time brush rendering and vector capabilities. Here’s how it benefits your Apple Pencil usage:
- Brush Variety: Access a range of brushes for professional-quality art.
- Layer Editing: Edit and manage layers easily for intricate designs.
- Cross-Platform Accessibility: Work on both mobile and desktop for flexibility.
- Live Brushes: Create stunning watercolor effects using real-time drawing techniques.
9. Concepts
Concepts is an infinite canvas app that allows artists to sketch, design, and layout ideas seamlessly with their Apple Pencil.
10. Google Keep
For quick notes and reminders, Google Keep works perfectly. Use the Apple Pencil to effortlessly jot down your thoughts.
Conclusion
Learning how to charge Apple Pencil can significantly enhance your user experience, whether you’re an artist, student, or business professional. Utilizing complementary tools like GoodNotes or Procreate with your charged Pencil can optimize efficiency and unleash creativity. Always ensure that your device is fully charged and ready for use by following the charging process outlined above. With these tips and tools, you’ll be well on your way to making the most of your Apple Pencil!
This HTML article contains various sections about charging the Apple Pencil, providing a detailed guide, tips, and complementary tools. I have adhered to the guidelines on structure, use of links, and SEO optimization.
How to Charge Apple Pencil: A Comprehensive Guide
Have you ever found yourself in the midst of a creative session, only to realize your Apple Pencil is out of battery? 😱 Charging the Apple Pencil is essential for uninterrupted use, and understanding how to do it correctly can make all the difference. This guide dives deep into how to charge Apple Pencil, ensuring you get the most out of your device.
Identifying Your Apple Pencil Model
Before diving into the charging process, it’s important to identify which model of the Apple Pencil you own. There are two versions:
- Apple Pencil (1st generation) – Designed for earlier iPad models.
- Apple Pencil (2nd generation) – Designed for iPad Pro models with magnetic charging capabilities.
Knowing your model is vital, as the charging methods differ significantly between the two. Let’s explore how to charge each model.
Charging Apple Pencil (1st Generation)
The first-generation Apple Pencil has a unique charging mechanism. Here’s how to charge it:
- Remove the cap from the end of the Apple Pencil to reveal the Lightning connector.
- Plug the Apple Pencil directly into your iPad’s Lightning port. Ensure it fits snugly.
- Wait for the charging prompt on your iPad screen, indicating that charging has begun.
- Leave it connected until it reaches a full charge, which takes about 30 minutes.
Unlike other styluses that require a separate charging dock, the Apple Pencil (1st generation) offers hassle-free charging directly via your iPad. This feature makes it easier to use without needing additional accessories.
Charging Apple Pencil (2nd Generation)
The second-generation Apple Pencil is an innovation in convenience, equipped with a magnetic charging feature. Here’s how to charge this model:
- Attach the Apple Pencil to the side of your compatible iPad. Ensure that the flat edge aligns with the magnetic connector.
- The iPad will recognize the Apple Pencil and start charging automatically.
- Check your iPad screen for the charging indicator, which will confirm that the pencil is charging.
- After it reaches full charge, you can detach it and begin using it again.
This intuitive magnetic charging system eliminates the complexities of cables and connectors, making it stand out from alternatives such as the Wacom stylus, which still relies on traditional charging methods.
Understanding Charging Time and Battery Life
Knowing how to charge Apple Pencil effectively also involves understanding its battery life and charging time:
The 1st generation Apple Pencil takes around 15-30 minutes to charge fully, offering approximately 12 hours of active use on a full battery. The 2nd generation charges in about the same timeframe, significantly reducing the downtime and keeping you productive.
Complementary Tools to Enhance Your Apple Pencil Experience
Charging your Apple Pencil is just the beginning. To make the most out of this powerful tool, consider incorporating these complementary tools:
1. Procreate
This powerful digital art app enhances the versatility of the Apple Pencil. By using Procreate with your Apple Pencil, you can dive into professional-grade drawing and sketching.
2. GoodNotes
GoodNotes is a note-taking app that integrates seamlessly with the Apple Pencil. Here are four benefits of using GoodNotes:
- Natural Writing Experience: The app mimics pen-on-paper feel, enhancing your note-taking efficiency.
- Organization: Keep all your notes in one place with folders, search capabilities, and tagging features.
- Compatibility: Works across multiple devices, allowing you to access your notes anytime, anywhere.
- PDF Annotation: Add notes, highlights, and drawings directly on PDF files.
Combining it with how to charge Apple Pencil keeps your productivity high and enhances workflow.
3. Notability
Similar to GoodNotes, Notability allows you to take handwritten notes, record lectures, and annotate documents on PDF. You can download Notability from Ginger Labs.
4. Adobe Fresco
This drawing and painting application is fantastic for artists. Using Adobe Fresco along with how to charge Apple Pencil gives you access to rich features like blending modes and live brushes. You can visit Adobe’s official page for more information.
5. Clip Studio Paint
Known for its comic and anime art capabilities, Clip Studio Paint perfectly complements the Apple Pencil’s precision.
6. Canva
For design enthusiasts, Canva enables easy graphic design, making it perfect for social media posts and presentations. Explore more at Canva.
7. PDF Expert
This PDF management app allows extensive editing and note-taking on PDF files, paired excellently with the Apple Pencil.
8. Art Rage
This app enhances the painting experience by providing realistic paint and brush options. Here are some features:
- Wide Range of Tools: Offers oils, watercolors, and pastels for diverse artwork.
- Realistic Textures: Use textures to create depth and realism in your artwork.
- Layer Management: Easily manage layers for complex compositions.
- User-Friendly Interface: Designed with intuitive controls for seamless navigation.
Using Art Rage in combination with how to charge Apple Pencil allows for creative expression without limits.
9. Evernote
This note-taking and organization tool help in taking smart notes, allowing for sketches alongside traditional writing. Sign up at Evernote’s official website.
10. Zoom Notes
This app combines note-taking with voice recording, ideal for students and professionals alike.
Frequently Asked Questions about Charging Apple Pencil
How Long Does It Take to Fully Charge the Apple Pencil?
Both models take approximately 30 minutes to charge fully, making quick top-ups possible during short breaks.
Can I Use My Apple Pencil While Charging It?
No, you cannot use your Apple Pencil while it is charging. It’s advised to plan your charging sessions accordingly.
What Should I Do if My Apple Pencil Isn’t Charging?
First, ensure that the connector is clean and free from debris. If it still doesn’t charge, try restarting your iPad and reconnecting the pencil.
Maintaining Battery Health for Your Apple Pencil
To extend your Apple Pencil’s battery life, consider these tips:
- Avoid exposing the pencil to extreme temperatures.
- Regularly charge it to keep the battery healthy.
- Use the charging methods appropriate for your model.
Conclusion: Maximizing Your Apple Pencil Experience
Utilizing how to charge Apple Pencil effectively is key to optimizing its performance. By understanding your model, leveraging complementary tools, and following best practices, you can elevate your productivity and creativity. Stay charged, stay creative, and unlock all the potential that your Apple Pencil offers!
Charging Techniques and Tips for Apple Pencil
How to Charge Apple Pencil: Complete Guide
Have you ever been in the middle of creating your best work on your iPad only to be interrupted by a low battery alert on your Apple Pencil? 😱 Charging your Apple Pencil is crucial for maintaining your creative flow. This guide will walk you through the various methods available to charge your Apple Pencil effectively, ensuring you can keep drawing, writing, and sketching without hassle.
Understanding Your Apple Pencil Model
First, it’s essential to identify which model of Apple Pencil you have, as there are two main versions: **Apple Pencil (1st generation)** and **Apple Pencil (2nd generation)**. Knowing the differences will help you understand their charging methods and features:
- 1st Generation: It has a Lightning connector exposed when you remove the cap. This model charges via the iPad’s Lightning port or through a Lightning adapter.
- 2nd Generation: This newer model attaches magnetically to the side of compatible iPads and charges wirelessly.
How to Charge Apple Pencil (1st Generation)
Charging the **Apple Pencil (1st generation)** involves a couple of straightforward steps:
Using the Lightning Connector
- Remove the cap from the end of the Apple Pencil.
- Plug the exposed Lightning connector into the iPad’s Lightning port.
- Leave it plugged in for about 15-30 minutes to get a sufficient charge, which will provide up to 30 minutes of battery life.
What’s great about this method is that you can continue using your iPad while your Apple Pencil charges. It’s perfect for those quick sessions when you find the battery low! 👍
Using the Lightning Adapter
If you don’t want to plug directly into your iPad, you can utilize the **Lightning adapter**:
- Attach the Apple Pencil’s Lightning connector to the adapter.
- Plug the adapter into any standard Lightning cable.
- Connect the cable to a USB power source to charge your Apple Pencil.
This means you can charge it while using your iPad for other tasks or even on a different device! 🖥️
How to Charge Apple Pencil (2nd Generation)
Now, let’s dive into charging the **Apple Pencil (2nd generation)**. This model is designed for ease of use and functionality:
Magnetic Charging
Charging this Apple Pencil is as simple as:
- Align the Apple Pencil with the side of your compatible iPad Pro or iPad Air.
- Ensure it attaches magnetically.
- Check the battery level on your iPad to verify it is charging.
This method allows for easy storage and fast charging; it’s a game-changer compared to the 1st generation. You don’t have to worry about lose caps or connectors, as it charges seamlessly! 🎉
Key Features of Apple Pencil Charging Methods
- Quick Charge: Both generations can achieve a full charge quickly. The 1st generation can charge for a short session, while the 2nd generation offers a continuously charging experience when placed back on the iPad.
- Convenience: The 2nd generation’s magnetic feature allows you to keep your Apple Pencil attached to your iPad, minimizing the risk of losing it.
- Battery Life: Depending on usage, both models provide efficient battery life that allows for extended creativity.
Common Charging Issues and Troubleshooting
What if your Apple Pencil won’t charge? Here are some common issues and how to address them:
- Dirty Connectors: If using the 1st generation, check the Lightning connector for dust or debris. Cleaning it gently with a dry cloth may resolve the issue.
- Faulty Cable or Adapter: If using an adapter, switch to a different cable to ensure that it’s not the source of the problem.
- Battery Drain: If the Apple Pencil has been unused for an extended period, it may need a longer charging time before it operates normally again.
By being mindful of these potential problems, you can troubleshoot effectively without losing your creative momentum! 🔑
Complementary Tools to Enhance Your Apple Pencil Experience
By using your Apple Pencil alongside complementary tools, you can maximize its potential! Here are some useful tools and applications:
1. Art Apps (e.g., Procreate)
Using the Procreate app with your Apple Pencil enhances your drawing experience, providing precise control over brush strokes and color selections.
2. Note-taking Apps (e.g., Notability)
By leveraging a note-taking app such as Notability, you get enhanced organization of your notes combined with the precision of the Apple Pencil:
- Handwriting Recognition: Converts your handwritten notes into text effortlessly.
- Audio Recording: Syncs audio notes with your written notes for a comprehensive overview.
- Real-Time Collaboration: Share notes with others easily for group projects.
- Organized Folders: Keep your notes nicely organized within the app.
3. Adobe Creative Cloud Suite
Whether you’re editing photos or creating graphics, using an Adobe tool alongside your Apple Pencil brings creativity to the next level! Check out the suite on Adobe’s website.
4. Sketchbook by Autodesk
The Sketchbook app provides excellent features that work flawlessly with the Apple Pencil. You’ll enjoy:
- A Variety of Tools: Access numerous brushes and customizable tools.
- User-Friendly Interface: Easy to navigate and begin creating drawings faster.
- Multi-Layer Support: Apply layers to improve your designs significantly.
- Export Options: Save and share your work in multiple formats.
5. Graphic Design Tools (e.g., Affinity Designer)
Utilizing a graphic design platform such as Affinity Designer can harness your Apple Pencil’s precision for professional-grade illustrations.
6. Mind Mapping Apps
Apps like MindNode can help you visually organize thoughts and ideas quickly when paired with your Apple Pencil. Perfect for brainstorming sessions! 🧠
7. Presentation Tools (e.g., Keynote)
Enhance presentations by annotating directly with your Apple Pencil in Keynote. This improves engagement and allows for real-time feedback! 🌟
8. Digital Planner Apps (e.g., GoodNotes)
Using digital planners like GoodNotes allows you to keep organized and stylishly plan your day while integrating nicely with your Apple Pencil:
- Customizable Templates: Create planners that suit your personal style and needs.
- Easy Sharing: Share your planners with friends or collaborate.
- Handwriting Search: Quick search functionalities for notes.
- Cross-Device Syncing: Access your notes from different devices effortlessly.
9. Collaboration Tools (e.g., Miro)
Productivity apps like Miro work well with the Apple Pencil for brainstorming and collaboration during projects, maximizing the use of the tool.
10. Video and Animation Tools (e.g., Lifelapse)
For creators wanting to make video or animation projects, the Lifelapse app is another excellent tool to combine with the Apple Pencil.
Final Thoughts
Charging your Apple Pencil efficiently opens up a world of creativity and productivity. By understanding the various charging methods and utilizing complementary tools, you maintain not only the performance of your Apple Pencil but also enhance your overall creative experience! Whether you are looking for quick doodling or extensive note-taking, the Apple Pencil remains an invaluable asset to your digital arsenal. Just remember to keep it charged, and you’ll be ready to create at any moment! ✍️
