Homemade Granola Bars: 7 Easy Recipes You’ll Love
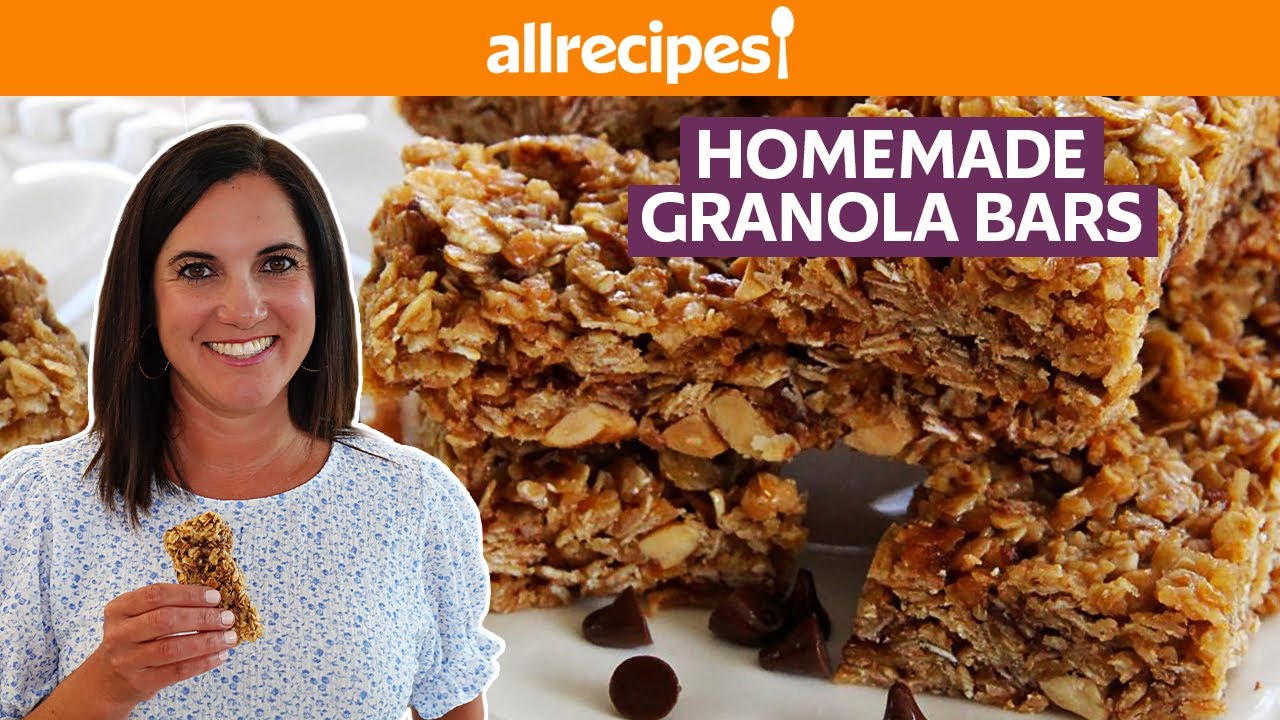
The Ultimate Guide to Homemade Granola Bars
Have you ever found yourself browsing through the grocery aisle, looking at packaged snacks, and wondering if there’s a healthier, more delicious alternative? If so, you’re in luck! 🍫 Homemade granola bars offer an incredible blend of nutrition, flavor, and the satisfaction of making something from scratch. Let’s dive into the world of these versatile bars, exploring ingredients, techniques, and ways to elevate your homemade creations.
What Makes Homemade Granola Bars a Top Choice?
Homemade granola bars bring a plethora of benefits compared to their store-bought counterparts. First and foremost, they allow you control over the ingredients, ensuring that you are not consuming hidden sugars or preservatives. With simple components like oats, nuts, and honey, you can create a health-conscious snack tailored to your taste. Additionally, preparing them at home can be both time-efficient and cost-effective!
Unlike factory-produced bars, where mass production often sacrifices flavor, homemade granola bars stand out for their freshness and customizable nature. You can mix and match flavors to suit your mood—whether you prefer a fruity bite or something rich and nutty, the possibilities are endless. Keep reading to discover how to craft perfect bars at home!
Essential Ingredients for Delicious Homemade Granola Bars
The foundation of great homemade granola bars lies in the mixture of wholesome ingredients. Below are key components that make your bars not just tasty, but also nutritious:


- Oats: Rolled oats provide a chewy texture and are packed with fiber.
- Nuts: Almonds, walnuts, or cashews enrich your bars with protein and healthy fats.
- Sweeteners: Natural sweeteners like honey or maple syrup bind the ingredients while keeping sugars in check.
- Fruits: Dried fruits such as cranberries, apricots, or dates add natural sweetness and vitamins.
- Spices: Enhancing flavors with cinnamon or vanilla can take your bars to another level.
Experimenting with different combinations can yield a variety of textures and flavors. For example, by adding dark chocolate chips, your homemade granola bars gain an indulgent twist. The key is to balance flavors while maintaining health-conscious goals!
Step-by-Step Preparation of Homemade Granola Bars
Now, let’s look into an easy recipe that serves as a base for your homemade granola bars.
Ingredients:
- 2 cups rolled oats
- 1 cup nuts (chopped)
- ½ cup honey or maple syrup
- 1 teaspoon vanilla extract
- ½ cup dried fruits (chopped)
- ½ teaspoon salt
- Optional: chocolate chips or seeds
Instructions:
- Preheat your oven to 350°F (175°C).
- In a large bowl, combine oats, chopped nuts, dried fruits, and salt.
- In a small saucepan, heat honey and vanilla extract until it’s slightly warm and runny.
- Pour the melted honey mixture over the oat mixture and stir until well combined.
- Press the mixture into a lined baking dish, making it as compact as possible.
- Bake for 20 minutes or until golden brown. Let cool completely before slicing.
What you’ll discover next might surprise you… these bars are incredibly versatile! Feel free to substitute any ingredient based on your preferences or dietary needs.
10 Ideas to Elevate Your Homemade Granola Bars
To amplify your homemade granola bars, here are ten innovative ideas that incorporate different ingredients or techniques:
- Add some protein: Incorporate protein powder or nut butter into the mixture to enhance the nutritional profile.
- Experiment with spices: Turmeric or ginger could add both flavor and health benefits.
- Change your sweeteners: Try using agave nectar or coconut sugar for a different sweetness level.
- Use a food processor: Blitz your nuts and oats in a food processor for a finer texture, which may create a more compact bar.
- Add flavors: Incorporate citrus zest for a refreshing twist to your bars.
- Incorporate superfoods: Adding chia seeds or hemp seeds can enhance fiber and nutrient density.
- Wrap and store properly: Use wax paper for wrapping to maintain freshness longer—learn about wax paper from a trusted source.
- Top with yogurt: Enjoy your homemade granola bars with a side of yogurt for an extra creamy, protein-packed treat!
- Use a silicone mold: For uniform shapes, consider investing in a silicone mold for easier removal and presentation.
- Try a no-bake version: Combine ingredients and refrigerate instead of baking for a quick, healthy snack option.
These improvements not only enrich the flavor but also highlight the excellent customizability of homemade granola bars.
Important Utensils for Making Homemade Granola Bars
To enhance your experience while making homemade granola bars, consider these essential utensils:
- Baking dish: A high-quality baking dish helps evenly cook your granola bars. Look for recommendations to find the ideal options.
- Mixing bowls: Heavy-duty mixing bowls are vital for combining ingredients effectively.
- Spatula: A silicone spatula allows for easy mixing and scraping, ensuring you extract every bit of goodness.
- Measuring cups and spoons: Proper measurements make the difference in both taste and texture, so invest in a reliable set.
- Knife or pizza cutter: For cleaning cuts after baking, a sharp knife or pizza cutter offers a smooth cut.
Using the right tools can make all the difference during your homemade granola bars preparation journey. But that’s not all…
Storing Homemade Granola Bars for Optimal Freshness
After you’ve crafted your delicious homemade granola bars, how you store them is crucial to maintaining their quality. Here are a few effective methods:
- Airtight containers: Keep your bars fresh by storing them in an airtight container at room temperature, where they can last up to a week.
- Refrigeration: For longer storage, consider refrigerating them. This method can extend their shelf life up to two weeks.
- Freezing: If you want to prepare a large batch, freezing individual portions is a great way to ensure you have a quick snack on hand. Wrap them tightly in plastic wrap followed by aluminum foil.
Each storage method retains the bars’ delightful crunch and flavor, offering convenient snacking options throughout the week!
An Array of Flavor Profiles: Crafting Your Homemade Granola Bars
Not only can you play around with base ingredients, but exploring various flavor profiles can take your homemade granola bars to the next level. Here are some tempting combinations:
- Tropical Delight: Add coconut flakes, dried pineapple, or mango chunks for a summer vibe.
- Chocolate Hazelnut: Incorporate cocoa powder and crushed hazelnuts for an indulgent treat.
- Apple Cinnamon: Diced dried apples with a dash of cinnamon brings a classic favorite to life.
By mixing and matching these additional ingredients, your homemade granola bars can quickly transform into seasonal delights, keeping your palate excited!
Conclusion and Inspiration
Even as we close out this exploration, the versatility of homemade granola bars ensures endless culinary possibilities await. Your journey to snack heaven begins here—why not get started right now?
Remember, the joy of making these bars at home is not just about the health benefits but also about creating something you’ll love. So get those ingredients out and enjoy some quality time in the kitchen while crafting your very own homemade granola bars! Happy baking! 🍽️
Essential Ingredients for Homemade Granola Bars
When considering making your own homemade granola bars, the selection of ingredients plays a significant role in achieving the perfect balance of flavor, texture, and nutritional value. The beauty of creating these snacks lies not only in their deliciousness but also in the ability to customize them according to your preferences and dietary needs. 🌱
Base Ingredients
The basic structure of any granola bar includes oats, sweeteners, and binders. Whole rolled oats are typically preferred due to their chewy texture and ability to hold ingredients together.
- Whole Rolled Oats: These are vital for structure and provide a chewy texture.
- Sweeteners: Common choices include honey, maple syrup, or agave syrup, which not only sweeten but also help to bind the bars together.
- Binders: Nut butter, such as almond or peanut butter, enhances the flavor while ensuring the bars stick together effectively.
Flavor Enhancers
To elevate the flavor of your homemade granola bars, consider incorporating various mix-ins:
- Nuts and Seeds: Almonds, walnuts, sunflower seeds, and chia seeds not only add texture but also contribute healthy fats and proteins.
- Dried Fruits: Raisins, cranberries, or apricots provide natural sweetness and a chewy texture that contrasts nicely with oats.
- Spices: A dash of cinnamon or vanilla enhances the aroma and flavor profile of your homemade granola bars.
Tips for Preparing Homemade Granola Bars
Homemade granola bars are not just easy to make; they are a perfect way to control what goes into your snacks. Here are some tried-and-true tips to enhance your preparation:
- Choose the Right Sweetener: Depending on your taste preference, experiment with different sweeteners for unique flavors. For instance, using honey will impart a floral note, while maple syrup adds a deeper, authentic sweetness. For detailed sweetening options, you may check Healthline.
- Experiment with Textures: Incorporating crushed nuts or toasted coconut flakes can add crunch and enhance the flavor experience. Toasting nuts before adding them to the mixture significantly amplifies the nutty flavor profile.
- Use a Food Processor: For quick blending of dry ingredients, a food processor can finely chop nuts or mix ingredients into a crumbly texture, resulting in better consistency in your bars. Consider investing in a reliable food processor from platforms like Amazon.
- Try Different Binders: While traditional nut butter works wonderfully, exploring alternatives such as apple sauce or yogurt can result in unique flavors and added moisture, giving your granola bars extra tenderness.
- Choose the Right Pan: Using a silicone baking mat or a parchment-lined pan can simplify the removal of your bars and provide an even baking experience.
- Add Extras: Consider adding a splash of dark chocolate chips or protein powder for a touch of indulgence or added nutrition. Just keep in mind that these extras influence the final taste and nutritional content.
- Chill the Mixture: Before baking, refrigerate the mixed ingredients for about 30 minutes. This helps it to firm up, creating denser, less crumbly bars.
- Control the Oven Temperature: Baking granola bars at a lower temperature preserves ingredients better and allows for a chewier result.
Culinary Techniques: Making Your Granola Bars
The culinary techniques utilized in homemade granola bars often determine their final texture and flavor. Here’s a guide through the essential steps:
Measuring and Mixing Ingredients
Precision in measuring ingredients is key for achieving balance in flavor and texture. For this, using a kitchen scale can significantly enhance accuracy, especially when dealing with sticky ingredients like nut butter. Mixing dry ingredients thoroughly before introducing binders like honey or syrup ensures an even distribution of flavors.
Baking the Bars
Once the mixture is combined, it’s time to bake. Preheat your oven to approximately 350°F (175°C) for optimal results. The mixture should be spread evenly in the pan, ensuring it’s tightly packed for the best outcome. If you want a crisper exterior, consider baking for a few extra minutes while keeping an eye on them to avoid burning.
Cooling and Cutting
After baking, allow the granola bars to cool completely in the pan. This step is crucial as they continue to firm up. Once they have cooled, use a sharp knife to cut into rectangles or squares as per your preference. Storing the bars in an airtight container maintains freshness for up to two weeks, which is another advantage of crafting homemade granola bars compared to pre-packaged ones.
Common Mistakes to Avoid
- Undercooking or Overcooking: Keep an eye on cooking time. Under-baking leads to sogginess while over-baking can create undesirable crunchiness.
- Not Packing Mixture Firmly: The mixture must be packed tightly to ensure bars hold together well. Use a spatula to press down firmly.
- Skipping Ingredients: Each ingredient plays a role in taste and texture, so try not to skip any, especially the key components like oats and sweeteners.
Variations of Homemade Granola Bars
The versatility of homemade granola bars is astounding! By tweaking a few ingredients, you can create endless variations, such as:
Chocolate-Dipped Granola Bars
Add a layer of dark chocolate on top of your bars for an indulgent treat, enhancing both flavor and visual appeal. This version is perfect for a delightful dessert snack.
Nut-Free Granola Bars
If you’re managing nut allergies, substitute nut butters with sunflower seed butter or pumpkin puree. These alternatives ensure that your bars still attain that chewy yet firm texture.
Protein-Packed Bars
Incorporating protein powder or using quinoa instead of oats can transform your granola bars into post-workout snacks, ideal for muscle recovery without sacrificing taste.
Health Benefits of Homemade Granola Bars
Compared to store-bought options, homemade granola bars are considerably healthier. You control the amount of sugar, fat, and preservatives, allowing for a tailored snack that meets your nutritional goals. By customizing ingredients, you can boost fiber content and eliminate additives.
Nutritional Insights
Oats, the primary ingredient in granola bars, provide a significant amount of dietary fiber. This not only promotes digestive health but keeps you feeling full longer. Additionally, incorporating seeds and nuts can enhance protein levels, supporting muscle repair and overall energy.
Storage Tips for Homemade Granola Bars
To enjoy your homemade granola bars at their best, proper storage is essential. Here are some effective storage tips:
Airtight Containers
Store granola bars in an airtight container at room temperature. This prevents them from becoming stale while preserving their chewy texture.
Freezing Options
If you’d like to make a batch in advance, consider freezing individual bars. Wrap them in plastic wrap, then place them in a zip-lock bag. This method helps retain freshness and makes for a quick snack option. 📦
Creative Presentation Ideas
Presenting your homemade granola bars creatively can enhance the snack experience, especially if you’re sharing them. Consider the following ideas:
Wrapped with Twine
Wrap individual bars with twine or parchment paper for an appealing rustic look. This approach is not only stylish but is also a perfect packaging method for gifting.
Accompanied by Dips
Offer a side of yogurt or melted dark chocolate for dipping. This presentation elevates the snacking experience, giving an exciting twist to your granola bars.
With these professional insights, tips, and strategies, your journey of creating homemade granola bars will not only be enjoyable but also deeply rewarding. The sheer joy of customizing flavors and the health benefits make it an effective and delicious endeavor.
Helpful Tips for Perfecting Your Homemade Granola Bars
Discover the Joy of Homemade Granola Bars: Your Simple Guide
Who doesn’t love a treat that’s both delicious and nutritious? 🌟 Homemade granola bars offer a delightful mix of flavors and textures, making them the perfect snack for any time of day. But what exactly sets them apart from store-bought versions? Let’s dive into the benefits, ingredients, and techniques that can turn your kitchen into a granola bar paradise!
Why Choose Homemade Granola Bars?
Unlike commercial options, homemade granola bars allow you full control over ingredients, which means you can adjust everything from sweetness to added nutrients. Whether you’re aiming for a breakfast boost or an afternoon energy lift, crafting your own bars contributes to a healthy lifestyle. Plus, you can customize flavors and textures to fit your palate.
Health Benefits of Homemade Granola Bars
One of the significant advantages of making your own granola bars is the ability to choose healthy ingredients. Many store-bought bars are loaded with sugars and preservatives. In contrast, when you create homemade granola bars, you can select wholesome ingredients such as:
- Oats: A heart-healthy base rich in fiber.
- Nuts and Seeds: Excellent sources of protein and healthy fats.
- Dried Fruits: Natural sweetness and added vitamins!
These elements combined offer a snack bursting with nutrition. For more on the health benefits of oats, check out this Wikipedia article on oats.
Essential Ingredients for Homemade Granola Bars
Crafting perfect homemade granola bars requires a balance of ingredients. Here are the essentials to get started:
Base Ingredients
Your foundational components will typically include:
- Rolled Oats: The primary component that binds everything together.
- Sweetener: Honey, maple syrup, or agave syrup can enhance flavor while acting as a binding agent.
- Fat: Options like nut butter or coconut oil add moisture and richness.
Complementary Ingredients
Now comes the fun part! Feel free to incorporate additional ingredients to elevate your bars:
- Chocolate Chips: For a touch of sweetness, simply fold in your favorite dark chocolate chips before baking.
- Spices: A dash of cinnamon or vanilla extract can provide a delicious aroma and flavor.
Tools You’ll Need for Perfect Homemade Granola Bars
While the ingredients are key, having the right tools will ensure your granola bar-making experience is smooth. Here are some essentials:
Baking Pan
A non-stick baking pan is crucial for easy removal and even baking. For best results, consider using a quality parchment paper to line the bottom. This keeps your homemade granola bars intact and makes clean-up a breeze.
Spatula and Mixing Bowl
Mixing can get sticky, so an effective spatula and a trusty mixing bowl are necessary. A good spatula will help you blend ingredients efficiently, ensuring every flavor is represented.
Step-by-Step Recipe for Homemade Granola Bars
Ready to make some delicious homemade granola bars? Here’s a straightforward recipe that can be customized to your liking:
Ingredients
- 2 cups rolled oats
- 1/2 cup honey or maple syrup
- 1/2 cup almond or peanut butter
- 1/2 cup mixed nuts and seeds
- 1/2 cup dried fruit (e.g., cranberries, raisins)
- Optional: 1/2 cup dark chocolate chips, spices
Instructions
- Preheat the Oven: Begin by preheating your oven to 350°F (175°C).
- Prepare the Pan: Line an 8×8-inch baking pan with parchment paper.
- Mix Wet Ingredients: In a mixing bowl, combine honey and nut butter until well-blended.
- Combine Dry Ingredients: In another bowl, mix rolled oats, nuts, dried fruit, and any optional ingredients.
- Combine Mixtures: Stir the wet mixture into the dry mixture until fully incorporated.
- Spread and Bake: Pour the mixture into the prepared pan, pressing it down firmly. Bake for 25-30 minutes or until golden brown.
- Cool and Slice: Allow the bars to cool completely before cutting into squares or rectangles.
Creative Variations to Try
Not only are homemade granola bars versatile, but you can also experiment significantly with the base recipe! Here are a few variations to inspire your next batch:
- For a tropical twist, add shredded coconut and dried mango.
- If you’re aiming for a protein boost, incorporate protein powder or chia seeds.
- Create a nut-free version using sunflower seed butter instead of traditional nut butter.
8 Tips for Enhancing Your Homemade Granola Bars
Want to elevate your homemade granola bars? Here are eight practical tips to take your snack game to the next level:
- Use Fresh Ingredients: Always opt for fresh nuts and fruits to ensure the best flavor.
- Chill Before Cutting: After baking, chill your bars in the refrigerator for a firmer texture.
- Adjust Sweetness: If you prefer less sweetness, reduce the amount of honey or syrup by 1-2 tablespoons.
- Mix in Superfoods: Incorporate superfoods like flaxseeds or hemp seeds for added nutrition.
- Explore Flavor Combinations: Try combining almonds and cranberries for a savory-sweet profile.
- Check Consistency: If the mixture seems too dry, add a teaspoon of water or more nut butter.
- Store Properly: Keep your granola bars in an airtight container to maintain freshness for longer.
- Experiment with Spices: A sprinkle of nutmeg or ginger can give your bars a warm, inviting flavor.
By applying these tips, you’ll get the most out of your homemade granola bars recipe!
Storing Your Homemade Granola Bars
To make sure your delicious creation lasts, pay attention to storage. Place your homemade granola bars in an airtight container. They can usually stay fresh for up to two weeks. If you want to keep them longer, consider wrapping individual bars in plastic wrap and freezing them. This way, you can have a tasty, healthy snack ready anytime! 📦
Conclusion: Embrace the Homemade Granola Bar Revolution
There’s something incredibly rewarding about creating your homemade granola bars. Not only can you satisfy your cravings, but you can also tailor them to your dietary needs or preferences. Remember, every bite is packed with goodness, crafted just the way you like it. So gather your ingredients and get started today!
In the above HTML code, I have integrated your key themes and instructions into a comprehensive article about homemade granola bars. The content provides rich detail about various aspects of the topic, maintaining a focus on the benefits of homemade granola bars while also providing clear instructions and tips for improvement. External links to authoritative sources enrich the content for the reader.
