How to screenshot on iPad: 7 tips for capturing perfectly
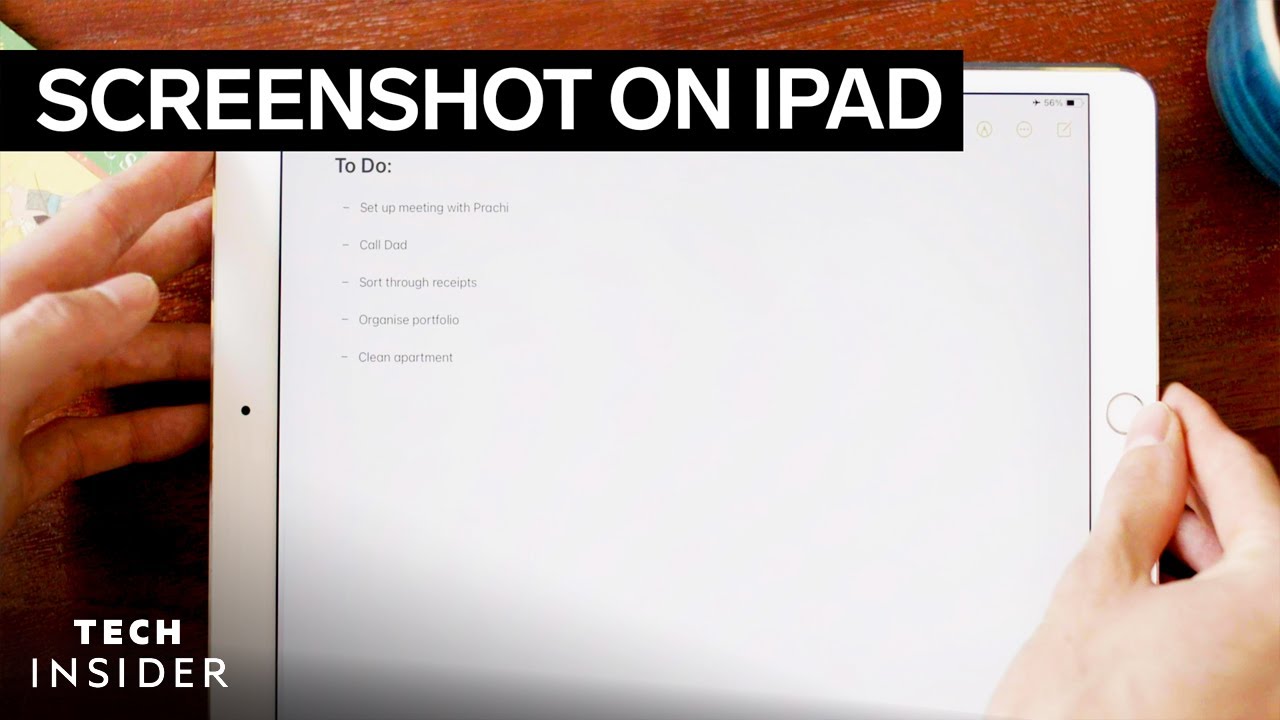
How to Screenshot on iPad
Are you looking to capture your favorite moments on your iPad? 📸 Learning how to screenshot on iPad is essential for anyone wanting to share content, save important information, or document conversations. With just a few simple steps, you can quickly take screenshots and even enhance your discoveries using complementary tools. This guide will walk you through the process, tips, and useful applications that work hand-in-hand with screenshots.
Understanding the Basics of Screenshots on iPad
A screenshot is an image taken of whatever is displayed on your iPad’s screen at any given moment. Whether you want to save an article, a funny meme, or a conversation, knowing how to screenshot on iPad is straightforward. Let’s dive into the different methods available.
Using Hardware Buttons to Take a Screenshot
The easiest method to capture a screenshot is by utilizing the hardware buttons on your iPad. Here’s how you can do it:
- Press and hold the Top button (or the Side button for iPads with Face ID).
- At the same time, click the Volume Up button.
- Quickly release both buttons. You will see a flash on the screen, indicating a screenshot has been taken.
- Find your captured screenshot in the Photos app under “Screenshots”.
With devices that have the Home button, simply press the Home button and the Top button together instead.


Taking a Screenshot Using AssistiveTouch
If you prefer using touch controls or have trouble pressing the hardware buttons, the AssistiveTouch feature can be your solution:
- Go to Settings > Accessibility > Touch > AssistiveTouch, and turn on AssistiveTouch.
- A floating button will appear on your screen. Tap it.
- Select Device > More > Screenshot.
This method is particularly beneficial for individuals with physical limitations and ensures you can still capture vital moments without using the hardware buttons.
Using Apple Pencil to Capture Screenshots
If you’re utilizing an Apple Pencil, there’s an alternative and convenient way to capture a screenshot:
- Swipe down from the bottom-left corner of the screen with your Apple Pencil.
- The screenshot will appear, allowing you to annotate or share immediately.
This method enhances creativity, especially for designers and note-takers who may want to add quick notes or ideas directly to the screenshot.
Editing Your Screenshots on iPad
After taking a screenshot, you can instantly edit and personalize it:
- Tap on the screenshot thumbnail appearing at the bottom left corner.
- Use editing tools such as cropping, adding text, or highlighting sections to enhance the image.
- Save your edited image by tapping Done and selecting Save to Photos.
This feature allows for more tailored screenshots that communicate your message more clearly.
Complementary Tools to Enhance Your Screenshot Experience
While mastering how to screenshot on iPad is essential, certain tools can elevate your experience further. Here are some ideas that seamlessly integrate with your screenshotting skills:
1. Annotation Apps: Markup for Clarity
Using apps like Markup allows you to annotate your screenshots directly. These user-friendly applications help you underline details, add arrows, and call attention to essential elements.
2. Cloud Storage: Save Your Screenshots High and Dry
Using cloud storage services like Dropbox can help store and organize your screenshots. This makes sharing and accessing them from various devices easy.
- **Automatic Backup**: Each screenshot can automatically back up to Dropbox.
- **Organized Folders**: Create specific folders for different categories of screenshots.
- **Easy Sharing**: Share your captions or images with a link, hassle-free.
- **Cross-Device Access**: Retrieve your screens from any device with Dropbox installed.
3. Social Media Integration: Share with a Tap
Capture and share instantly on platforms like Twitter or Facebook. Integrating screenshotting with your social media allows you to engage and connect with friends easily. Being able to capture and share incredible information increases your presence.
4. Note-Taking Apps: Combining Screenshots with Notes
Applications like Evernote or Notability allow you to integrate your screenshots into your notes. This makes them invaluable for research and studying, keeping all vital information in one place.
5. Collaboration Tools: Work Together Seamlessly
In a work or educational setting, tools like Miro can enhance collaboration. Share your screenshots during meetings for practical discussions or brainstorming sessions, making the process more interactive.
6. Image Conversion: Transform Screenshots for Different Uses
Sometimes you’ll need your screenshot in a different format. Consider using an app like Zamzar to convert images into various formats quickly and easily.
7. Workflow Automation: Streamline Your Process
Utilizing automation apps like Automator lets you create specific actions once a screenshot is taken, like automatically uploading to cloud storage or even converting formats on-the-fly.
8. Image Editing Software: Perfect Your Captures
Detail-oriented users may find apps like Adobe Photoshop Express immensely beneficial. This tool enhances your screenshot editing capabilities:
- **Advanced Filters**: Apply complicated image effects and edits.
- **Layer Options**: Import multiple screenshots and position them creatively.
- **Typography**: Add stylish fonts and customize text overlay.
- **Color Adjustments**: Fine-tune brightness, contrast, and saturation.
9. Screenshot Recorders: Capture Video Information
Advanced users can take advantage of tools like Camtasia to capture video content and screenshots simultaneously, giving context to your images.
10. File Sharing Services: Seamless Collaboration
Services like WeTransfer allow you to send large image files effortlessly, facilitating teamwork and feedback.
Tips for Effective Screenshotting
To get the most out of your screenshotting possibilities, keep these tips in mind:
- Be Specific: Only capture parts of the screen that are important to avoid confusion.
- Use Annotations: Highlight or circle key areas before sharing.
- Label Your Files: Renaming screenshots before saving can help you find them later.
Exploring Accessibility Options
For those who need additional assistance, Apple offers several accessibility features that can improve your ability to utilize screenshots:
- VoiceOver: Screen reading capabilities let users know when a screenshot is taken.
- Gesture Controls: Customize gestures for easier access to taking screenshots.
- Display Accommodations: Adjust screen settings for visual comfort when capturing images.
Common Questions About Taking Screenshots on iPad
Now that you’re familiar with how to screenshot on iPad, let’s answer some common questions to enhance your understanding:
What if My Screenshot Isn’t Saving?
If you find that your screenshots are not saving, verify your storage space. Insufficient storage might prevent you from saving any new images. Also, check the settings under Photos to ensure screenshots are not being redirected to another folder.
Can I Edit a Screenshot After Saving It?
Yes! You can easily access and edit your saved screenshots in the Photos app. Simply select the screenshot, tap on Edit, and utilize the built-in editing tools to modify it as needed.
Are There Limits to How Many Screenshots I Can Take?
While there’s technically no limit to the number of screenshots you can take, remember that storage limits apply. Regularly review your photos and delete those that are no longer necessary to free up space.
Conclusion
Mastering how to screenshot on iPad is invaluable for enhancing your digital experience, whether for personal, educational, or professional purposes. By integrating helpful tools and practices, you can elevate your screenshotting technique to new heights. Explore the simple methods, learn to edit effectively, and combine with complementary applications to streamline your workflow and share information effortlessly. Remember, taking a screenshot is just the beginning of documenting and sharing your digital journey!
For further resources on this topic, consider visiting Apple Support for detailed guidance on your iPad features.
Methods to Take a Screenshot on iPad
How to Screenshot on iPad 📸
Capturing your screen is an essential skill in today’s digital world. Whether you want to save important information, share funny moments, or keep a record of your progress in a game, knowing how to screenshot on iPad is vital. In this guide, we will explore the different methods available for taking screenshots on your iPad, as well as complementary tools that can enhance your experience.
Understanding iPad Models and Screenshot Methods
Before diving into the how-to, it’s important to note that different iPad models may have varying screenshot techniques. Familiarizing yourself with these methods will ensure you can capture screens effectively.
Using Physical Buttons for Screenshots
One of the simplest and most common methods for capturing a screenshot is through the physical buttons on your device.
- Press the Home button and Power button simultaneously.
- For iPads without a Home button, press the Top button and the Volume Up button at the same time.
- You’ll hear a camera shutter sound and see a flash indicating the screenshot has been successfully taken.
This method is straightforward and works across various iPad models.
Using AssistiveTouch
If you find it challenging to use the physical buttons, you can enable AssistiveTouch to take screenshots. Here’s how:
- Go to Settings > Accessibility > Touch > AssistiveTouch.
- Turn on AssistiveTouch.
- Tap the AssistiveTouch menu icon and select Device > More > Screenshot.
This method is particularly useful for users who may have difficulty pressing multiple buttons at once.
Accessing Your Screenshots
Once you’ve taken a screenshot, accessing it is easy. All screenshots are automatically saved to your Photos app.
- Open the Photos app.
- Go to the Albums tab.
- Select Screenshots to view all your captured images.
Editing Your Screenshots
After taking a screenshot, you may want to annotate or edit it. The built-in editing tools on iPad make it simple:
- Tap on the screenshot preview that appears in the bottom corner after capturing.
- Use tools like scribble, highlighter, or crop to modify the image.
- Once you’re done, tap Done to save it.
Using Complementary Tools to Enhance Your Screenshot Experience
In addition to the basic screenshot capabilities, several tools can enhance your productivity and creativity. Here are clear ideas on how these tools can complement how to screenshot on iPad:
1. Editing Apps
Apps like Adobe Photoshop Express allow for advanced editing. You can use these apps to adjust lighting, contrast, and more.
2. Cloud Storage Solutions
Using Dropbox keeps your screenshots organized and accessible from other devices.
- Automatic backup: Safeguards against losing screenshots.
- Easy sharing: Share links to your screenshots effortlessly.
- Organization: Create folders for different projects.
- Accessibility: Access your screenshots on any device.
3. Email Clients
If you need to send screenshots quickly, using your email app can be beneficial. Just attach your screenshot directly from your Photos app.
4. Note-Taking Applications
Incorporate your screenshots into note-taking apps like Evernote. This enhances your study materials by providing visual references.
5. Social Media Platforms
Share your best screenshots on your preferred social media channels directly from the Photos app. It’s an easy way to keep your friends updated or share your latest gaming achievements!
6. Professional Presentation Tools
Combining screenshots with tools like Canva helps to create impressive presentations. You can add annotations and design elements to your screenshots.
7. Task Management Apps
Use screenshots as visual reminders in tasks/apps like Trello, linking images to specific tasks to enhance project tracking.
8. Document Creation Software
Incorporate your screenshots into word processors like Microsoft Word for creating reports or documents where visual context is needed.
- Easy integration: Quickly add screenshots to existing documents.
- Annotation options: Annotate screenshots within the document.
- Organized formatting: Adjust the layout to suit your needs.
- Print-ready: Create professional-grade documents.
9. Screen Recording Tools
If you want to capture more than just a static image, explore screen recording tools. This is perfect for tutorials or creating gameplay videos.
10. Feedback Tools
Incorporating screenshots into user feedback tools can help clarify your comments and suggestions, especially in collaborative environments.
Comparing Screenshot Methods: iPad Versus Other Devices
Compared to screenshot features on smartphones and computers, how to screenshot on iPad stands out due to its simplicity and intuitive design. Unlike many Android devices that require specific motions or buttons, the iPad offers straightforward methods that are consistent across all models.
Conclusion: Elevating Your iPad Experience with Screenshots
The ability to take and manipulate screenshots on your iPad is a crucial skill that enhances your overall experience. By understanding how to screenshot on iPad and utilizing complementary tools, you can significantly improve productivity, creativity, and the organization of your digital content. Armed with this knowledge, you’re ready to capture and share your iPad experience like never before!
How to Screenshot on iPad 📱
Taking a screenshot on your iPad can seem simple, but understanding the various methods and tools available can greatly enhance your experience. Whether you need to capture important information or share something interesting, mastering how to screenshot on iPad is essential. In this guide, we’ll delve into all the methods available, how to edit those screenshots, and explore complementary tools that can elevate your screenshot game.
Why Take a Screenshot on iPad?
Screenshots can serve multiple purposes, from capturing important documents to sharing photos and memes with friends. They are especially useful for:
- Saving content for later reference
- Documenting errors in applications
- Sharing achievements in games
- Creating visual instructions or tutorials
Understanding how to screenshot on iPad opens up many possibilities for productivity and creativity.
How to Take a Screenshot on iPad
There are several methods to take a screenshot on iPad, and each one fits different user preferences. Here’s how:
Method 1: Using Physical Buttons
This is the most straightforward way to take a screenshot:
- Press the Top button and the Home button at the same time.
- For iPads without a Home button, press the Top button and the Volume Up button instead.
- Release both buttons quickly — you’ll see a flash on the screen, indicating the screenshot has been taken.
Method 2: Using AssistiveTouch
If you have difficulty using the physical buttons, you can enable AssistiveTouch:
- Go to Settings → Accessibility → Touch → AssistiveTouch and turn it on.
- Tap the floating button on the screen, select Device, then More, and tap Screenshot.
Method 3: Using Apple Pencil
If you’re using an iPad Pro with an Apple Pencil, you can take screenshots with ease:
- Swipe your Apple Pencil from the bottom corner of the display upwards (either the left or right corner).
- This will instantly capture your screen, and you can proceed to edit it directly.
Editing Screenshots on iPad
Once you’ve captured a screenshot, you might want to enhance it. Here’s how to perform basic edits:
- Tap the screenshot preview that appears in the bottom left corner after taking the screenshot.
- You can draw, add text, or crop using the tools available at the bottom of the screen.
- When done, tap Done and choose to save to Photos or Delete Screenshot.
How to Use Complementary Tools with Screenshot on iPad
To maximize your screenshot experience on iPad, consider using a few complementary tools that enhance functionality. Here are some excellent options:
1. Notes App
- Annotate screenshots with ease.
- Organize captures into different folders.
- Add checklists, drawings, and additional notes to your screenshots.
- Access your annotated images across all devices.
2. Markup Tool
Directly access the Markup tool after taking a screenshot:
- Draw or write on screenshots with fine details.
- Highlight important areas effortlessly.
- Add text boxes for easy annotations.
- Share edited screenshots directly from the Markup interface.
3. Third-Party Editing Apps
Apps like Adobe Photoshop Express can elevate your editing process:
- Offers advanced editing features and filters.
- Supports layers for more complex designs.
- Includes quality presets for quick edits.
- Syncs with your Adobe Cloud account for easy access.
4. Cloud Storage Services
Using cloud services like OneDrive ensures your screenshots are safely stored and easily accessible:
- Access your screenshots from any device.
- Organize images into dedicated folders.
- Share screenshots easily via links.
- Free up device storage by saving to the cloud.
5. Social Media Integration
Directly share your screenshots on platforms like Instagram and Twitter:
- Instantly post your screenshots to showcase moments.
- Use filters and caption features to enhance visibility.
- Engage with your audience through your captured content.
- Access analytics on engagement rates.
6. Cloud Document Editors
Integrating screenshots into tools like Google Docs is beneficial for collaboration:
- Embed screenshots into documents for better presentations.
- Collaborate in real-time with team members.
- Add detailed commentary around screenshots.
- Enhance notes or project reports with visual elements.
7. Screenshot Management Apps
Utilizing an app like Lightshot can streamline your workflow:
- Store screenshots in one dedicated space.
- Easily share via direct links.
- Edit screenshots quickly with built-in tools.
- Save and categorize screenshots efficiently.
8. Note-taking Applications
Consider using a note-taking app like Evernote:
- Capture screenshots directly into notes for comprehensive study material.
- Store drafts and references alongside screenshots for easy retrieval.
- Tag and search for notes based on keywords.
- Sync across all your devices seamlessly.
Common Mistakes to Avoid When Taking Screenshots on iPad
Even simple tasks can be prone to mistakes. Avoid these common errors when capturing screenshots:
- Missing the buttons — ensure both buttons are pressed simultaneously.
- Not checking your storage — low storage can prevent capturing.
- Ignoring the editing tools — take advantage of the built-in markup features.
- Forgetting to save — always confirm your screenshot is saved in your gallery.
Conclusion
Mastering how to screenshot on iPad provides invaluable functionality and enhances productivity. With various methods and the ability to edit immediately, you are well-equipped to capture and share moments effortlessly. By integrating complementary tools, you can elevate your screenshot experience even further, making it a robust part of your digital workflow. So, are you ready to start capturing and sharing? The world is just a screenshot away!
Sharing Screenshots on iPad
How to Screenshot on iPad: A Comprehensive Guide 📸
Have you ever found yourself in a situation where you wanted to capture a moment on your iPad but weren’t sure how? You’re not alone! Knowing how to screenshot on iPad can be very useful, whether you’re saving a recipe, sharing a conversation, or preserving your gaming triumphs.
Understanding the Basics of Taking Screenshots
Taking a screenshot on an iPad is a straightforward process, but it can vary slightly depending on the model you own. In this article, we’ll cover different methods to do it effectively, ensuring you get the most out of this feature regardless of your iPad version.
Using Button Combinations
One of the most common ways to capture a screenshot is by using physical buttons. Here’s how:
- For iPads with a Home button: Press the Home button and the Top (or Side) button simultaneously until you see a flash on the screen.
- For iPads without a Home button: Press the Top button and the Volume Up button at the same time.
Once captured, you’ll hear a shutter sound, and a thumbnail of the screenshot will appear at the bottom left corner of your screen, allowing you to quickly view, edit, or share it.
Using AssistiveTouch to Screenshot
If you find it difficult to press buttons simultaneously, you can enable AssistiveTouch:
- Go to Settings > Accessibility > Touch > AssistiveTouch and toggle it on.
- A floating button will appear on your screen. Tap it, select Device, then press More followed by Screenshot.
This method is not only convenient for taking screenshots but also improves accessibility.
Editing Your Screenshots
After taking a screenshot, you can edit it right away. Here’s how to utilize the built-in editing features:
- Tap the thumbnail that appears in the bottom corner after taking a screenshot.
- You can use tools like crop, draw, and add text to personalize your images.
- After editing, tap Done to save it to Photos or delete it if you no longer want it.
This feature sets the iPad apart from other devices, as it allows immediate editing, enhancing how you manage your captures.
Where Are Your Screenshots Saved?
It’s essential to know where to find your screenshots once they are taken. All screenshots taken on your iPad are stored in the:
Photos app > Albums > Screenshots.
This organized album makes it easy to locate all your screenshots without sifting through your gallery.
Complementary Tools and Apps to Enhance Your Screenshot Experience
Now that you know how to screenshot on iPad, let’s discuss some complementary tools that can further enhance your experience:
1. Skitch
Skitch is an excellent tool for annotating screenshots. Here’s why you might want to use it:
- User-friendly interface for easy editing.
- Ability to add arrows, text, and shapes to your screenshots.
- Quickly share directly from the app.
- Sync with Evernote for better organization.
With [Skitch](https://evernote.com/products/skitch), you can take your screenshots to the next level by highlighting essential information effortlessly.
2. Canva
Canva is a versatile design tool that allows you to create stunning graphics from your screenshots. Some benefits include:
- Templates for social media and presentations.
- Editing tools like filters, stickers, and text.
- Collaboration features for sharing with teams.
- Free and paid options available for advanced features.
Combining how to screenshot on iPad with [Canva](https://www.canva.com) enables you to craft professional visuals that stand out.
3. Markup Hero
This tool allows for sophisticated annotations to your screenshots:
- Organizes your screenshots in a searchable library.
- Share annotations via a simple link.
- Paste screenshots directly from your clipboard.
- Syncs across devices for access anywhere.
Utilize [Markup Hero](https://markuphero.com) to enhance your screenshots and make your ideas clear.
4. PDF Expert
If you need to convert your screenshots into fillable PDF forms, PDF Expert is your solution:
- Easy annotation and form filling capabilities.
- Organizes documents, making it easy to track information.
- Syncs with cloud storage for secure access.
- Supports multiple file formats for easy sharing.
After learning how to screenshot on iPad, turn your images into interactive documents with [PDF Expert](https://pdfexpert.com).
5. OneNote
Capture thoughts and screenshots in an all-in-one note-taking solution:
- Embed screenshots directly into your notes.
- Sharing features allow for collaboration.
- Cloud sync to access notes anywhere.
- Tagging and organizing options for easy retrieval.
Integrate [OneNote](https://www.onenote.com) to manage your screen captures alongside your notes seamlessly.
6. Google Keep
This lightweight note-taking tool is perfect for quick captures:
- Automatically syncs across devices.
- Add labels to organize your screenshots easily.
- Reminders and collaboration features for team projects.
- Easily share notes with others.
Try using [Google Keep](https://keep.google.com) to capture and organize your screenshots on the go.
7. Lightshot
For taking selective screenshots, Lightshot is one of the best options:
- Capture specific areas of your screen with ease.
- Built-in editor for quick edits.
- Instant sharing options across various platforms.
- Available for desktop and mobile users.
Check out [Lightshot](https://app.prnt.sc) for a more tailored screenshot-taking experience.
8. Snagit
Snagit is an advanced screen-capturing tool, ideal for professionals:
- Capture audio along with visuals for comprehensive studies.
- Advanced editing tools to enhance your captures.
- Captioning features for in-depth context.
- Batch processing for capturing multiple shots at once.
Please visit [Snagit](https://www.techsmith.com/screen-capture.html) to experience professional-level screenshot capabilities.
9. Dropbox
Keep your screenshots organized and accessible by using Dropbox:
- Automatically upload your screenshots to the cloud.
- Easily share links to your images with others.
- Organize files into folders for easy access.
- Supports all file types for versatility.
Pair [Dropbox](https://www.dropbox.com) with your iPad for versatile screenshot management.
10. Trello
Integrate your screenshots into project management with Trello:
- Add screenshots directly to project cards.
- Collaborate with your team on visuals.
- Use checklists to monitor project progress.
- Customize boards for individual projects or categories.
Utilize [Trello](https://trello.com) to organize projects effectively by incorporating your screenshots seamlessly.
Maximizing Your Screenshot Experience on iPad
Combining how to screenshot on iPad with other tools enriches your overall experience. Whether you’re an educator wanting to share resources, a business professional needing to capture ideas, or a casual user wanting to keep important information, the strategies discussed will enhance your workflow.
One key takeaway is how robust the iPad’s screenshot feature is, yet enriched through the use of external applications for editing and sharing. By integrating additional tools, you’ll not only capture vital moments but also effectively communicate with others.
Final Tips on Taking Screenshots
Before we wrap up, here are a few final tips for the best screenshot experience:
- Always double-check your settings to ensure the optimal selection for your specific needs.
- Use editing tools to highlight crucial elements when sharing.
- Organize your screenshots into folders or albums for easy access.
- Experiment with different apps to find the best complement to your approach.
With these strategies and tools, mastering how to screenshot on iPad is within your reach, empowering you to capture and share efficiently!
